top of page

ARC REACTOR LIGHT

TIME: 2023 SPRING
DURATION: 14 WEEKS
SOFTWARE
DEMO VIDEO


BACKGROUND
Iron man's MARK II arc reactor has become an icon for decades and is also one of the most popular elements in the Sci-Fi movie industry. And the goal of this term is to make a real-life arc reactor that can be used as a displayed light element.
USERS
Smart Home Users
-
Users who enjoy enhancing their space with interactive, tech-integrated lighting solutions.
Tech Enthusiasts & Innovators
-
Individuals excited by futuristic technology, seeking products with innovative controls, such as gesture-based interfaces.
Pop Culture Collectors
-
Collectors of unique, pop-culture items that showcase modern design with functional features.
Marvel Enthusiasts
-
Passionate fans of the Marvel Universe who enjoy collecting themed merchandise, especially inspired by Iron Man.

GOALS
Adjust the brightness and switch between color modes effortlessly with intuitive gesture controls, eliminating the need for physical buttons.

TURN ON/OFF
-
Main Button --- Control the light on and off
GESTURE COMMAND
STATE MACHINE DIAGRAM

CIRCUIT DIAGRAM

HARDWARE
GESTURE SENSOR
FEATHER MOTHERBOARD
44.5MM DIAMETER NEOPIXEL
60MM DIAMETER NEOPIXEL
MOTION SENSOR
BREAKOUT BUTTON

FEATHER MOTHERBOARD
GESTURE SENSOR

44.5MM DIAMETER NEOPIXEL RING
60MM DIAMETER NEOPIXEL RING

PIR MOTION SENSOR
BREAKOUT BUTTON
CODE PART
IMPORT BOARD
INPUT BLOCK
BUTTON SWITCH
CALCULATION BLOCK
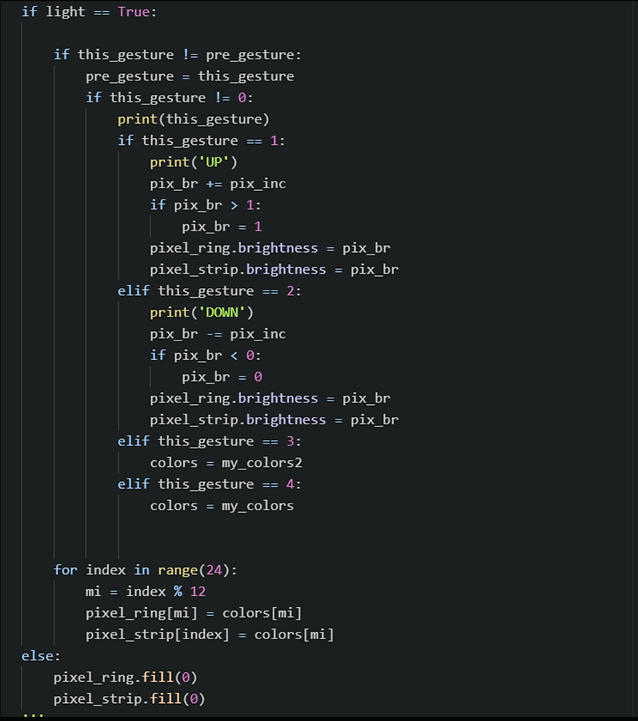
GESTURE SENSOR CODE
PRESET

INPUT BLOCK

BUTTON SWITCH

GESTURE SENSOR CODE

CALCULATION BLOCK

3D MODELING AND PRINT
FIRST DRAFT
FIRST 3D PRINT
SECOND DRAFT
SECOND 3D PRINT
THIRD DRAFT
SOLDERING
FINAL PRINT OUT


FIRST DRAFT
Build the main body of the arc reactor

After completing the rough model, I tested its ability to fit the electronic components. I used SLA printing for the main body and FDM printing for the holder. However, I misjudged the thickness of the SLA print, causing the Neopixel ring to not fit properly. To resolve this, I need to extend the center diameter to 46mm to ensure compatibility.
FIRST PRINT

SECOND DRAFT


After the first failure, I decided to widen the diameters of both the circles and the holders to improve the fit. Additionally, I worked on the main box underneath to neatly organize and collect the wires from the Neopixel rings and I2C sensors for a cleaner assembly.

The assembly works smoothly overall, but I encountered a few design issues. The on/off switch doesn’t align with the hole in the main box, and the box height is insufficient to accommodate the motherboard. Additionally, I overlooked the gesture sensor placement, so I now need to redesign it to fit in a more accessible and visible position.
SECOND PRINT
Test Print and Assemble

THIRD DRAFT


Building on the second draft, I adjusted the size of the hole in the main box and repositioned the gesture sensor to a visible spot at the top of the box. The design is now almost complete!
SOLDERING


With all the parts printed, I began the soldering process, carefully wiring each component onto the perf board. Following my circuit diagram, I connected each wire with precision, ensuring all connections were secure and properly aligned. This process brought the entire design to life, transforming individual components into a functional system.
THE GENERAL TEST BEFORE ASSEMBLY


After four hours of printing, the design has come to life, glowing beautifully as shown in the photos. The vibrant blue lighting adds a dynamic, high-tech feel, perfectly capturing the futuristic essence of the project. I’m excited to power it up through the computer to see it in full action.
FINAL PRINT

bottom of page
